
Introduction #
In this tutorial we are going to connect the Nuvoton NuMaker-IoT-M487 to Amazon Web Service (AWS) IoT and run a simple “Hello World” demo.
For this tutorial you will need:
- Nuvoton NuMaker-IoT M487 – Contact us for more info
- MicroUSB Cable
- Windows Computer
- Keil Essential or higher or Keil Nuovoton Edition installed
- Nuvoton Nu-Link Keil Driver installed
- Nuvoton M480 device packs installed using the pack installer
- Nuvoton Nu-Link Keil driver installer should prompt you to install these
- Wifi connection to the internet
- AWS account and an IAM user with permission to access AWS IoT and FreeRTOS cloud services
Download Amazon FreeRTOS #
Let’s start by getting the Amazon FreeRTOS source code. This can be downloaded from github or by cloning the git using the following command:
git clone https://github.com/aws/amazon-freertos.git -b release --recurse-submodulesNote: this will clone the release branch along with the required submodule. The release branch is the tested release code, whereas the master branch is the development code.
Once done, we need to open our example project. In Keil, click File > Open, and in the bottom right corner of the Open window, ensure that Project Files is selected:
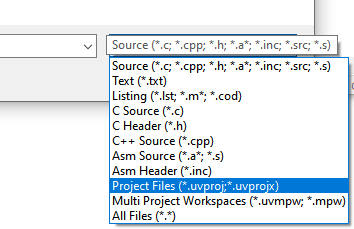
Navigate to where you downloaded the Amazon FreeRTOS repository and open the following file:
amazon-freertosprojectsnuvotonnumaker_iot_m487_wifiuvisionaws_demosaws_demos.uvproj
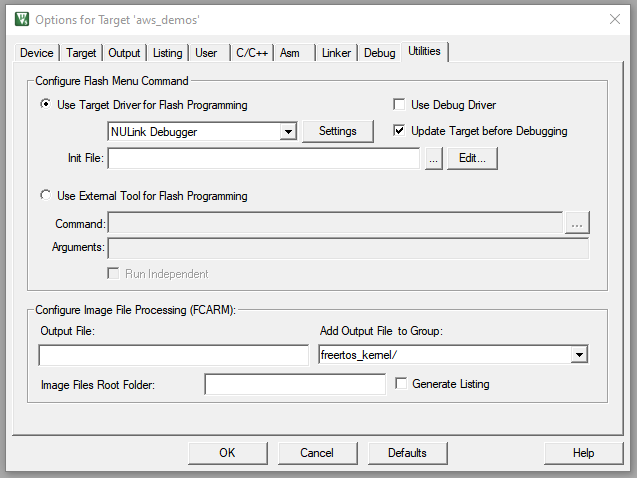
Once opened we need to verify that Keil is setup correctly for our Nuvoton device. Right click on the project name in the project panel and selection Options:

Click on the Utilities tab and verify that Use Target Driver for Flash Programming is selected and that NULink Debugger is set as the target driver:
Next click on the Debug tab and firstly ensure that NULink Debugger is selected at the top right:
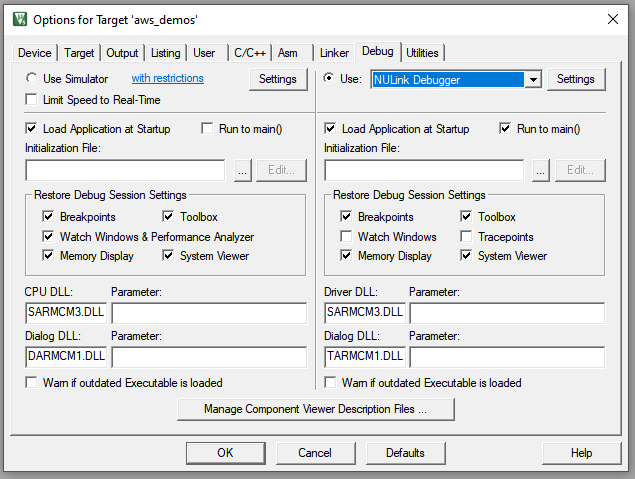
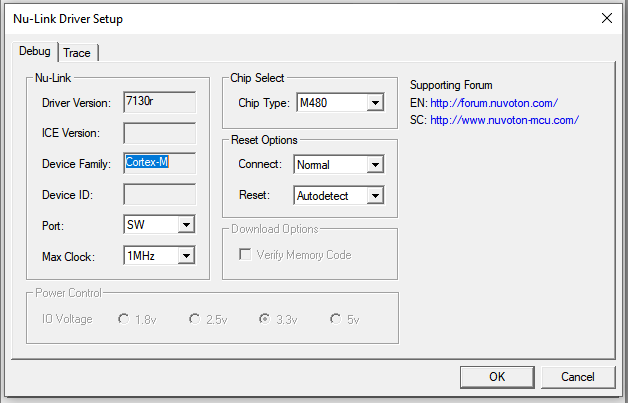
Click the Settings button next to this drop-down box and in the window that appears verify that the Chip Type is set to M480:
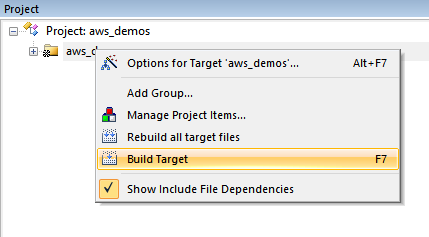
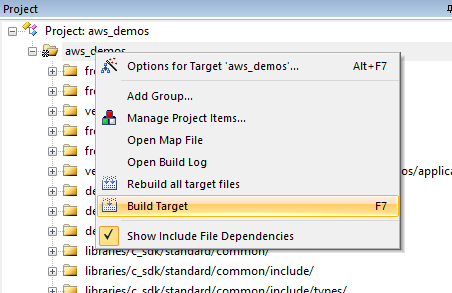
Click OK on both of these windows and back in the project panel, right click on the AWS demos project and select build target:
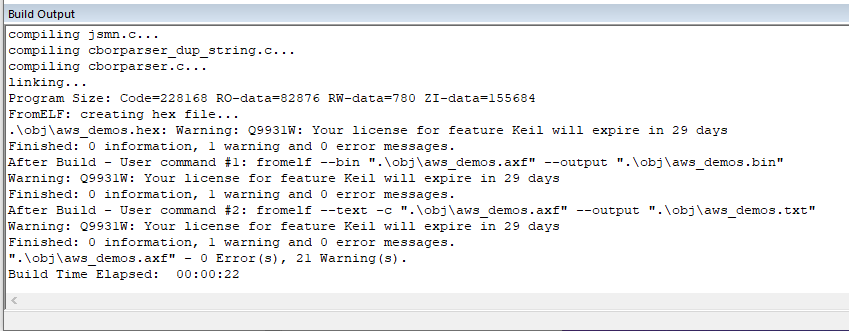
If all went well, we should be able to build successfully:
Register NuMaker-IoT Board with AWS IoT #
We now need to configure the demo code to correctly connect to our AWS cloud but before we can do that we must first register it with AWS IoT. For this to work we need the following:
- AWS IoT Policy
- This grants your device permission to access AWS IoT resources.
- AWS IoT Thing
- This is the configuration of your device that’s shown in AWS IoT, every device you have connected to AWS IoT must have an associated thing.
- Private & Public Key Pair
- These keys are used to authenticate your device with AWS IoT.
Create an AWS IoT Policy #
Let’s start by creating the policy that will decide what permissions your devices will have when accessing AWS IoT. We first need to get our AWS account number and AWS region.
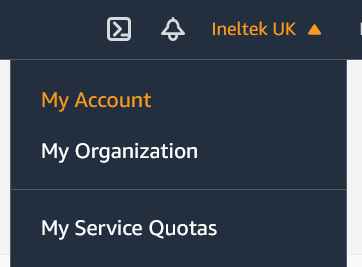
In the AWS Management Console, select My Account from the account drop down menu in the top right corner of the page:
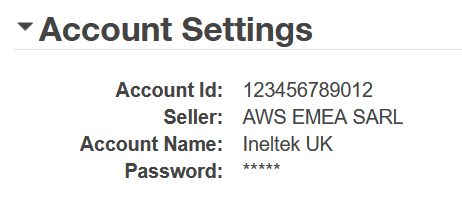
From there we can get our Account ID:
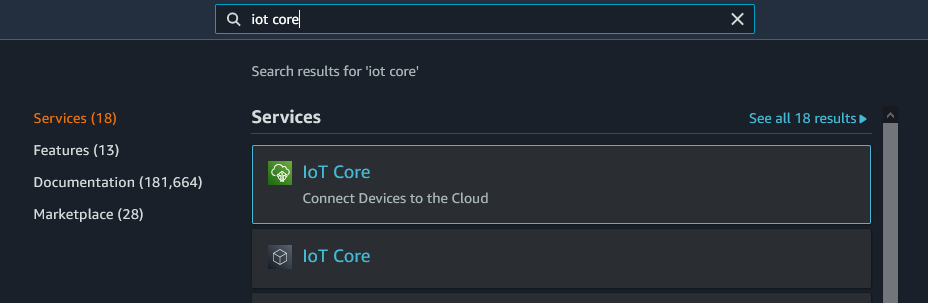
Next go to the AWS IoT Console by typing IoT Core into the search bar at the top and selecting IoT Core:
In the top right hand corner of the page we can see the region we are currently using:
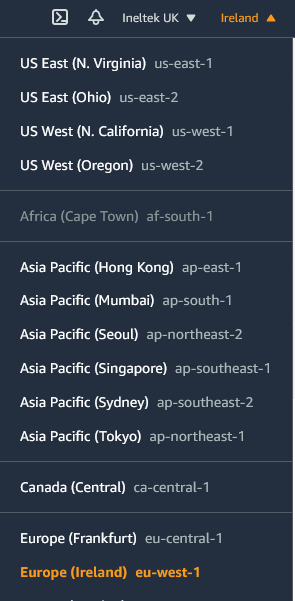
In my case I am connected to Europe (Ireland), but we need to note down the correct endpoint name: eu-west-1.
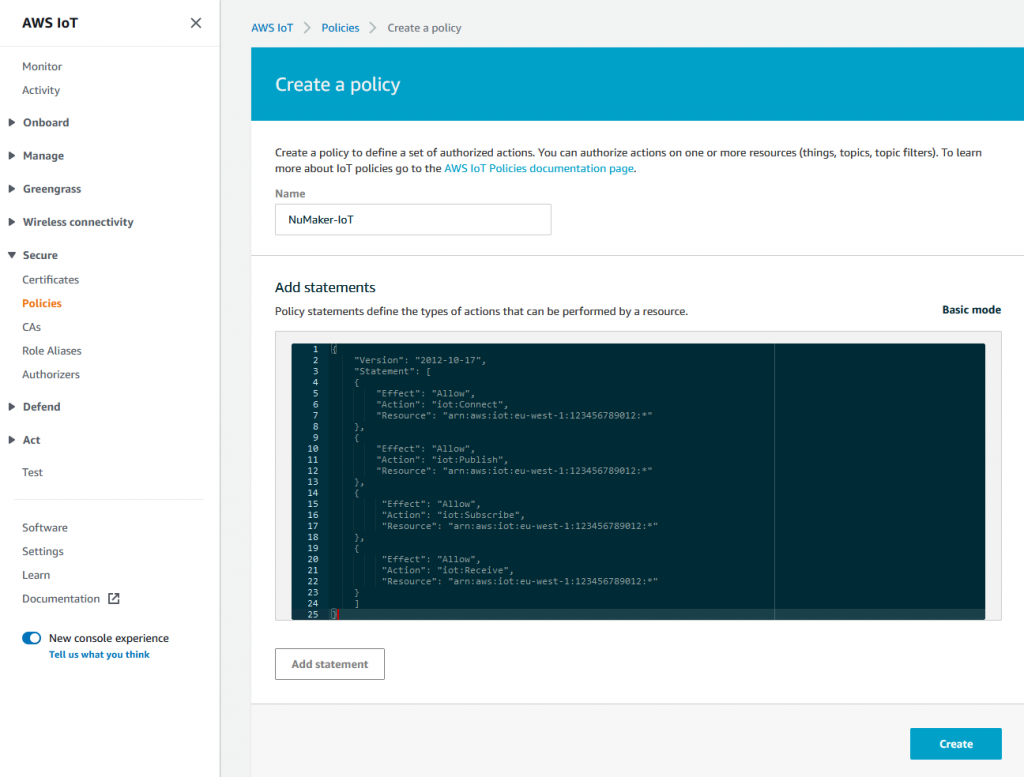
From the navigation pane on the left, click Secure > Policies and then click the Create button from the top right. Enter a name for your policy and in the Add statements section, click advanced mode.
Copy and paste the following JSON and replace aws-region and aws-account with your AWS Region and account ID:
{
    "Version": "2012-10-17",
    "Statement": [
    {
        "Effect": "Allow",
        "Action": "iot:Connect",
        "Resource":"arn:aws:iot:aws-region:aws-account-id:*"
    },
    {
        "Effect": "Allow",
        "Action": "iot:Publish",
        "Resource": "arn:aws:iot:aws-region:aws-account-id:*"
    },
    {
         "Effect": "Allow",
         "Action": "iot:Subscribe",
         "Resource": "arn:aws:iot:aws-region:aws-account-id:*"
    },
    {
         "Effect": "Allow",
         "Action": "iot:Receive",
         "Resource": "arn:aws:iot:aws-region:aws-account-id:*"
    }
    ]
}
For example:
"Resource": "arn:aws:iot:eu-west-1:123456789012:*"This policy grants the following permissions:
iot:Connect- Grants your device the permission to connect to the AWS IoT message broker with any client ID.
iot:Publish- Grants your device the permission to publish an MQTT message on any MQTT topic.
iot:Subscribe- Grants your device the permission to subscribe to any MQTT topic filter.
iot:Receive- Grants your device the permission to receive messages from the AWS IoT message broker on any MQTT topic.
Once complete, click the Create button:
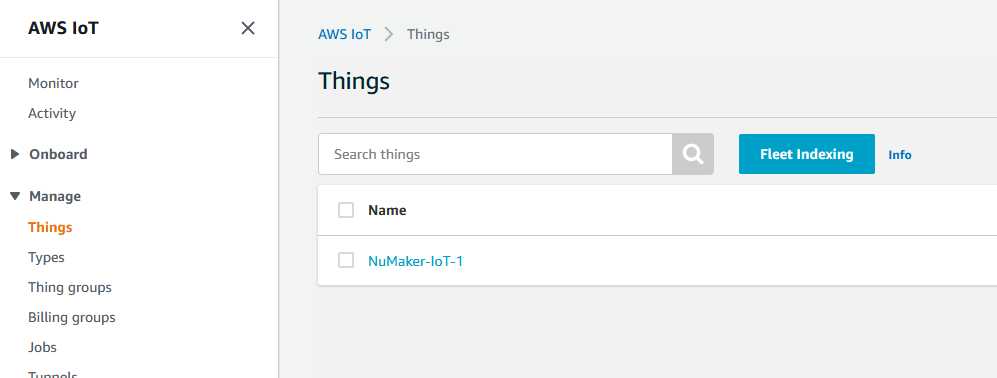
Create an AWS IoT Thing #
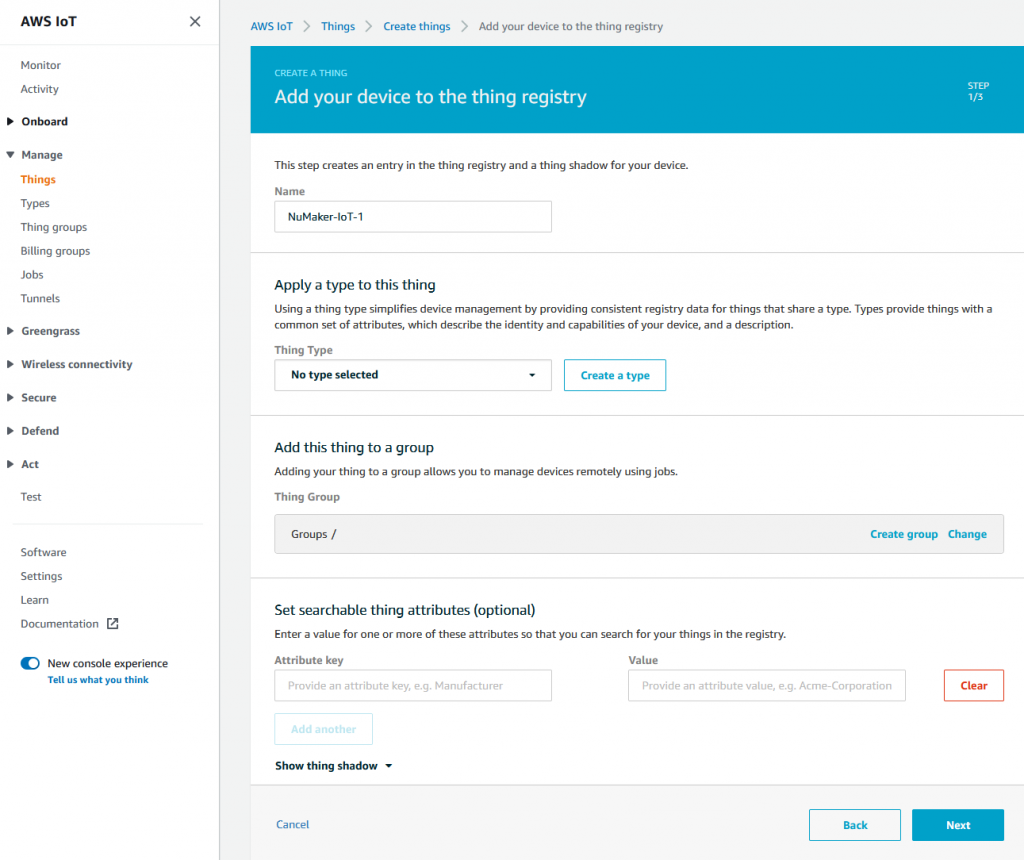
We now need to create a thing in the IoT Console that will allow our device to connect. In the navigation pane on the left select Manage > Things. If you don’t have any existing devices, select Register a thing, otherwise click the Create button. Next select Create a single thing and then on the next page enter a name for your device and click Next:
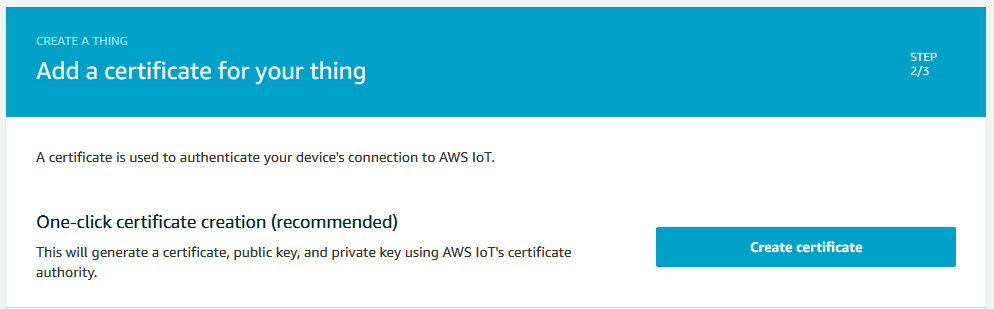
On the next page we need to choose the certificate we’ll be using to authenticate this thing. For this tutorial, we are going to ask AWS to create one for us. Click the Create certificate button next to One-click certificate creation (recommended):
On the next page, download the certificate and private key, in my case this is 7602ee04f8.cert.pem and 7602ee04f8.private.key:
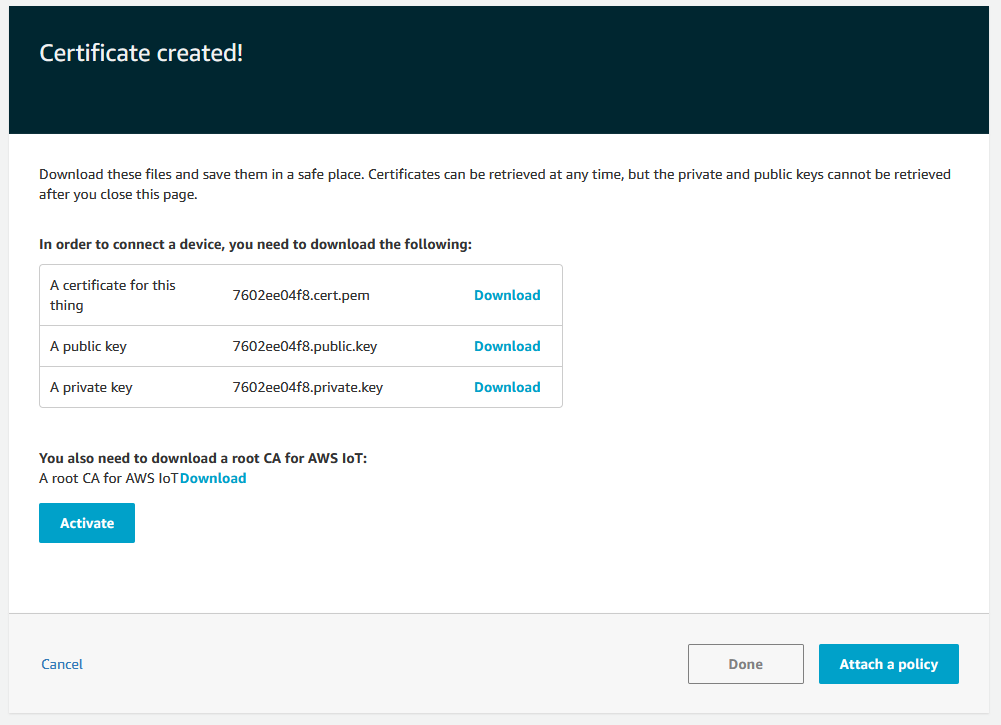
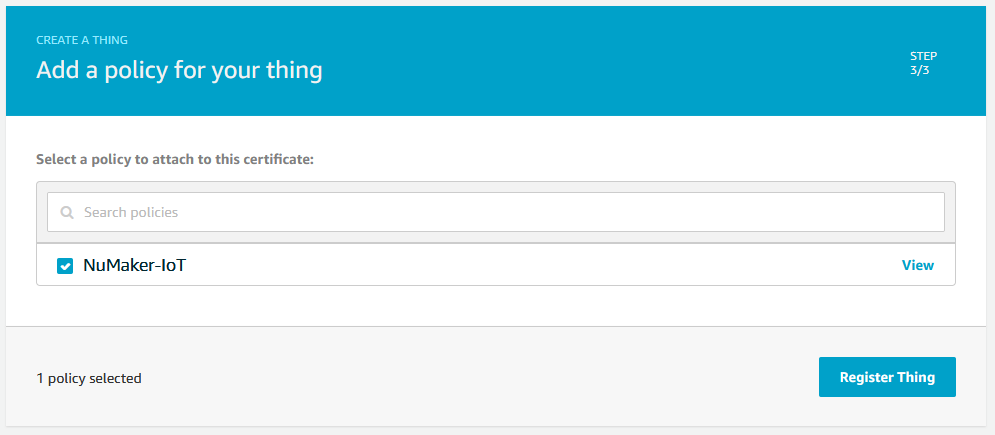
Once done click the Attach a policy button. Next we need to attach a policy to our certificate that grants our device access to AWS IoT operations. Select the policy we just created and click the Register thing button:
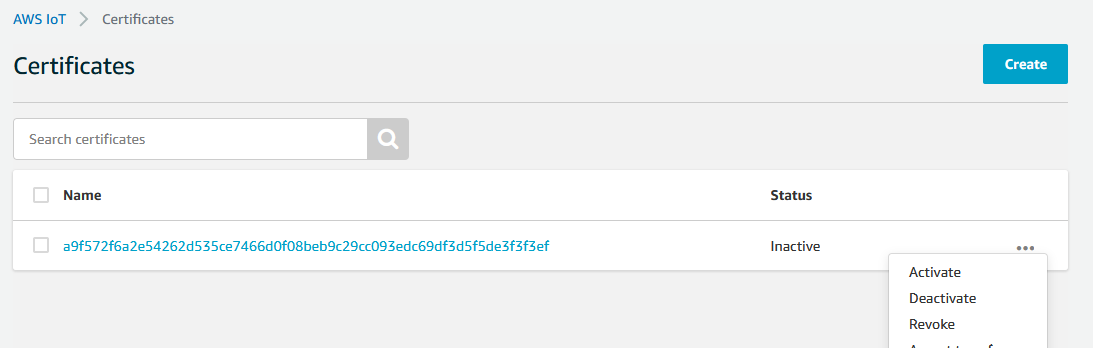
Finally, we need to activate the certificate that was just created. In the navigation pane on the left select Secure > Certificates and next to the certificate that was just created, click on the 3 dots menu and select Activate:
We can now move on to configure our demo code.
Configure Demo Code #
In order for our demo code to connect to AWS IoT and be correctly recongised and authenticated, we need the following information:
- Thing name
- AWS IoT endpoint
Our Thing name is what we called our thing in the previous step, in my case, I called it NuMaker-IoT-1:
If I were to add multiple NuMaker-IoT boards to AWS, I could call each one NuMaker-IoT-2, NuMaker-IoT-3, and so on.
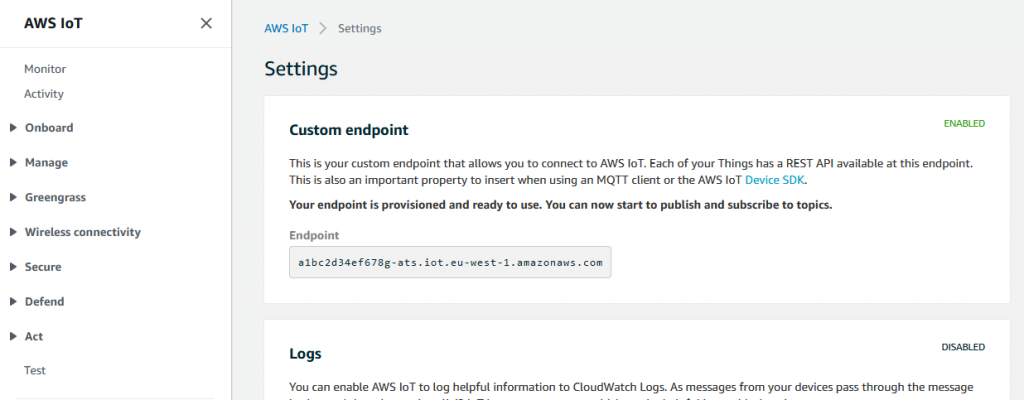
Our AWS IoT endpoint is the server address that our device will connect to, and we can find this by click on settings in the navigation pane on the left:
Once there, our AWS IoT endpoint should be at the top:
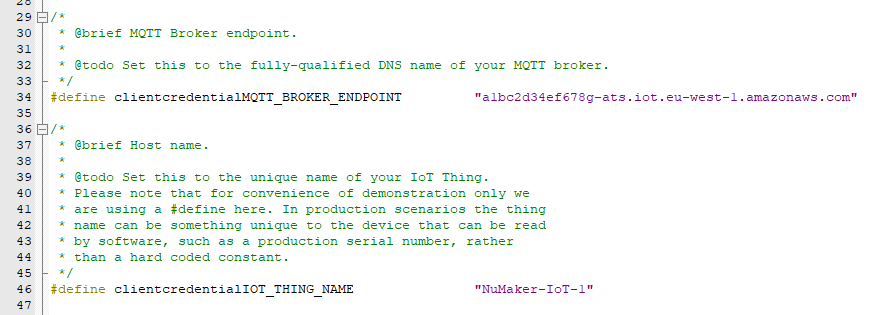
Let’s make a note of both of these and head back into Keil. We only need to configure a single file for our demo to work:
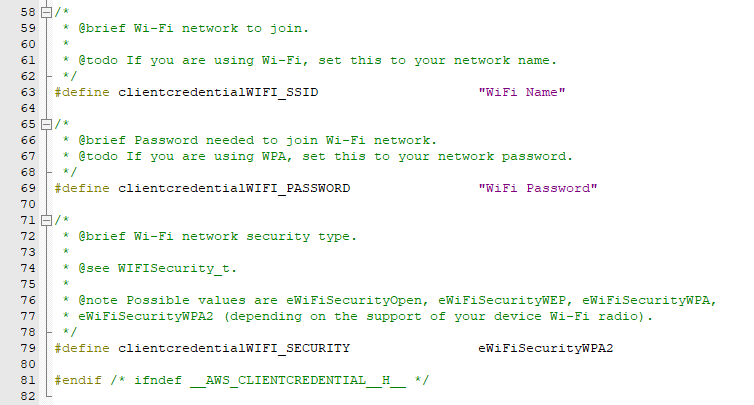
/demos/include/aws_clientcredential.h
We need to specify our IoT endpoint and thing name:
And we need to specify our WiFi network name, passkey and security type:
Adding Security Certificate to Demo Code #
The final step before we can connect is to add our security certificate that we donwloaded previously. In the Amazon FreeRTOS source code, open up:
tools/certificate_configuration/CertificateConfigurator.html
And select your certificate PEM file and private key PEM file that we downloaded earlier:
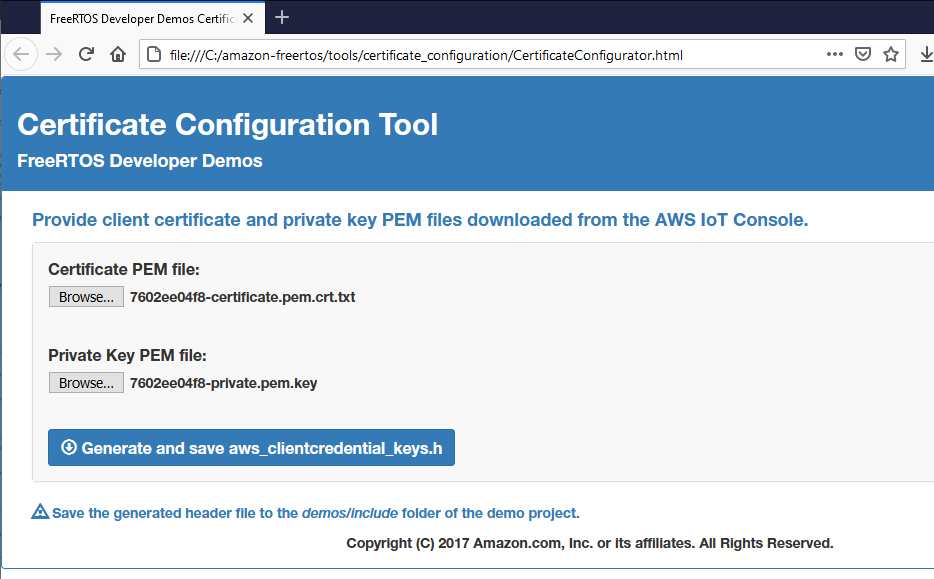
Once done click Generate and save aws_clientcredential_keys.h:
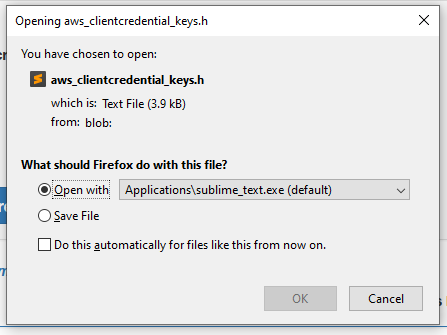
Save this file to the demos/include directory and replace the file if it already exists. Head back into Keil and build our code again:
Testing #
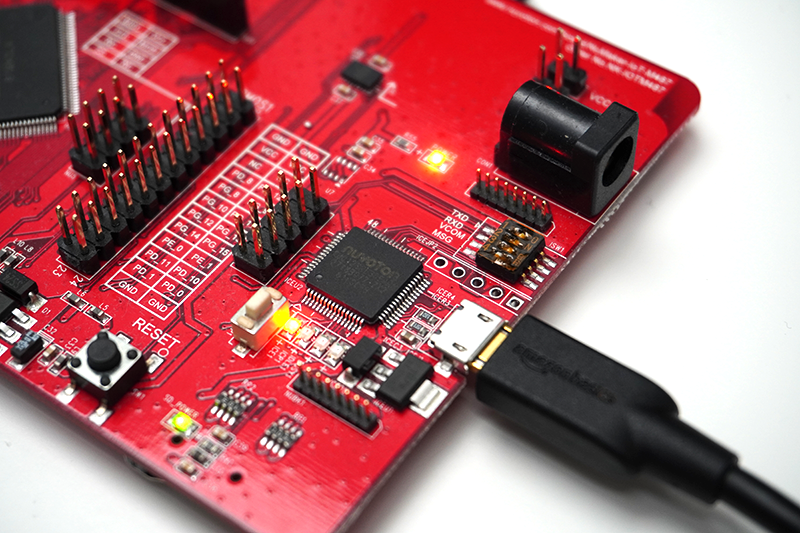
Once done, we can then load our code into the NuMaker-IoT-M487. Start by plugging a microUSB cable into the on-board NuLink port:
Then in Keil, select Download from the Flash menu:
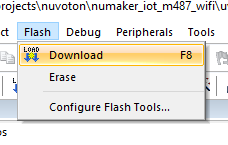
This should download our built code to the NuMaker-IoT-M487.
The on-board NuLink will enumerate as a serial port when we plug it into our computer:
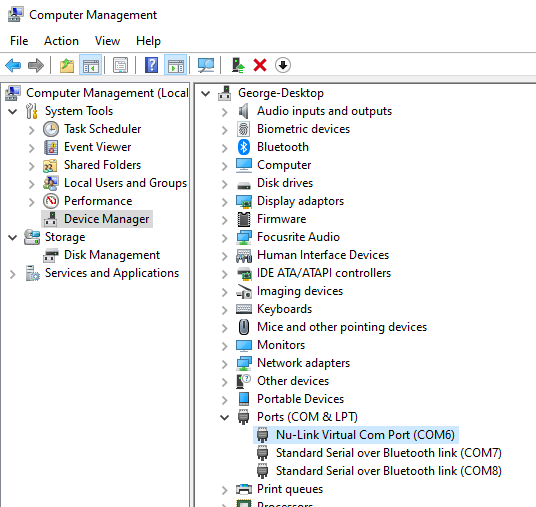
This means we should be able to open a serial terminal to see what’s happening on the device (baud rate is 115200):
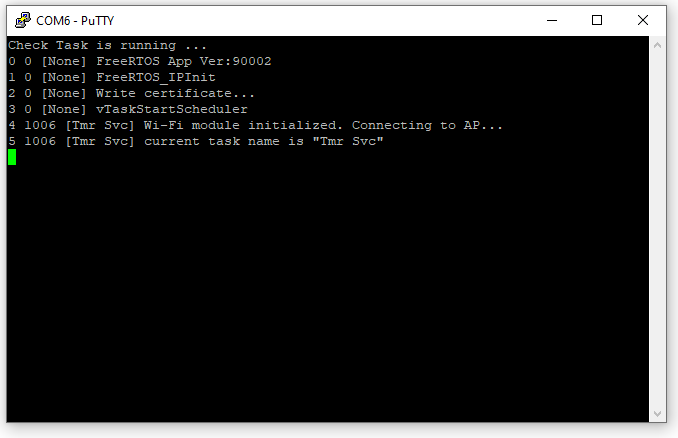
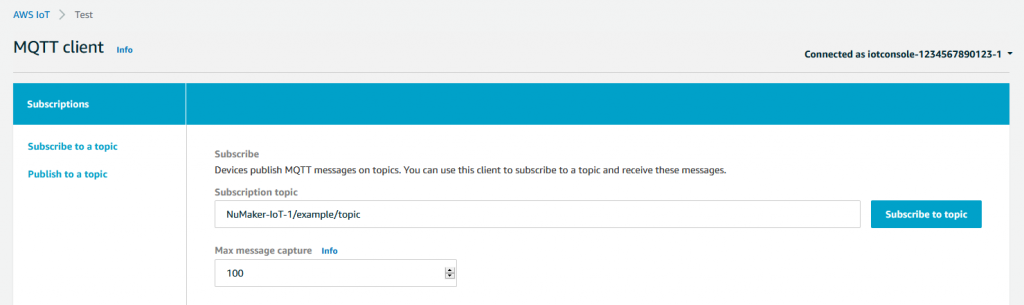
Let’s go back to AWS IoT and from the left navigation panel, select Test. We then can then subscribe to an MQTT topic and display the output. Type ThingName/example/topic (but replace ThingName with your thing’s name), or type # to subscript to all topics:
Hit the RESET button on the NuMaker-IoT-M487 and we should see our incoming messages:
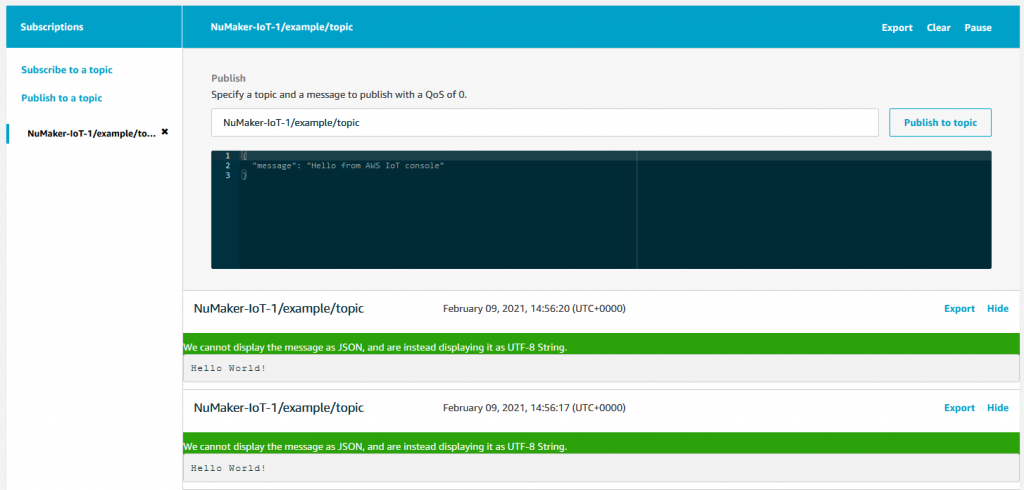
We can see our device sending these messages in the serial terminal:

We can also click on the Publish to topic if we didn’t subscribe to a generic topic (#) and see our MCU acknowledge an incoming message in the serial terminal:

Conclusion #
Obviously this is just demo code showing our device sending the same string of data to our AWS IoT service over and over, but I hope this gave you a good look at how to get started with the Nuvoton IoT devices.


