
Introduction #
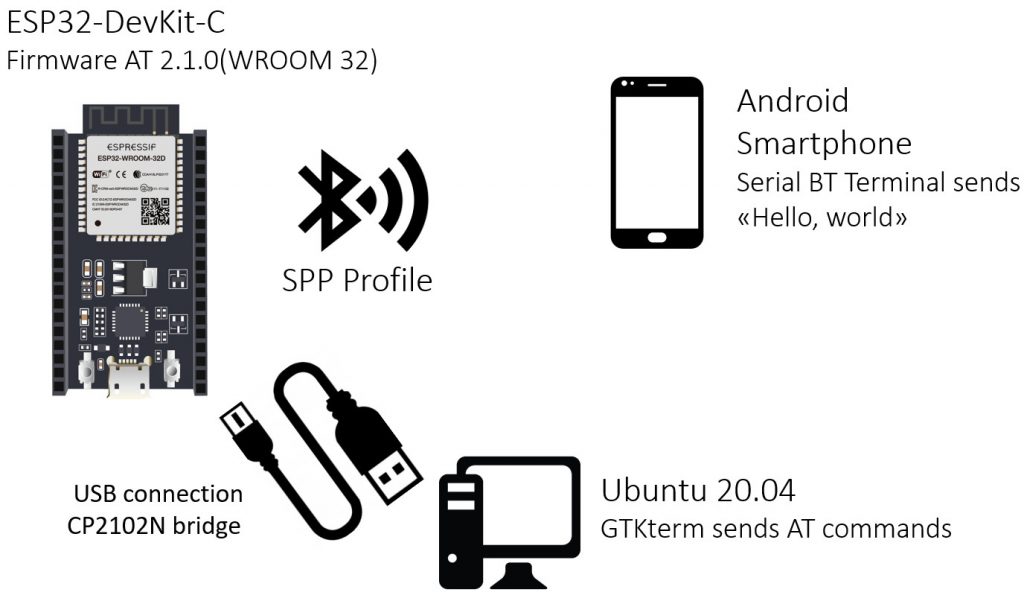
In this tutorial we’ll using AT commands on the ESP32-WROOM to establish a serial connection between an ESP module and a smartphone – or any Bluetooth device with Serial Port Profile (SPP) support. To do this, we’ll be using the ESP-AT firmware flashed in the previous tutorial. The easiest way to connect a microcontroller to a smartphone is by means of a transparent serial connection, however it’s worth noting that no iOS devices support Bluetooth Classic (and by extension SPP) and whilst Android devices can support SPP in firmware, it depends on whether or not the hardware inside the device can.
The Serial Port Profile (SPP) protocol, which was designed as a wireless replacement of an RS-232 (UART) connection. SPP is based on ETSI 07.10 and the RFCOMM protocol and it emulates a serial cable to provide a simple substitute for existing RS-232. Serial Port Profile defines how to set up virtual serial ports and connect two Bluetooth enabled devices.
For this tutorial you’ll need:
- Espressif ESP32-DEVKIT-C – Contact us for more info
- PC running Linux
- The examples shown here are running on Ubuntu 20.04
- A device with Serial Port Profile support
- The examples shown here are using an Android Smartphone with Serial Bluetooth Terminal.
We’ll start by showing how to enable Bluetooth Classic on the ESP-AT firmware and how to install the Serial Bluetooth Terminal on an Android device. In the third section we’ll put it all together and establish a transparent serial connection between the host and the smartphone. If you are already familiar with the menuconfig and the SPP protocol, you can jumpt to the AT command list in the third section, where the commands are explained.
ESP32: Enable Classic BT on the ESP-AT Firmware #
Bluetooth Classic is disabled by default in the ESP-AT firmware, so we need to enable it in through menuconfig tool before being able to connect through SPP. If you’re not familiar with the configuration, building and flashing of the AT firwmare, please refer to the previouos tutorials: Getting Started and Customizing Build.
To begin the configuration, let’s move inside the esp-at folder and open the menuconfig.
cd ~/esp-at
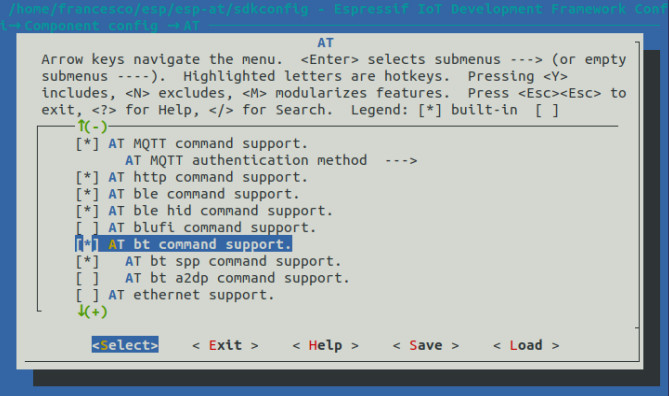
./build.py menuconfigIn the menuconfig tool, head to Component config > AT and pressing Y on the keyboard, select the following settings settings:
- AT bt command support
- AT bt spp command support
At this point you should have a * next to both lines:
Press TAB and click on Save and Exit. We are now ready to build and flash the firmware, so type the command:
./build.py flashIf everything was configured correctly, the ESP-AT firmware should built without any issues:

If you have any permission errors, refer to the resolution steps in the previous tutorial.
Smartphone: install Serial Bluetooth Terminal #
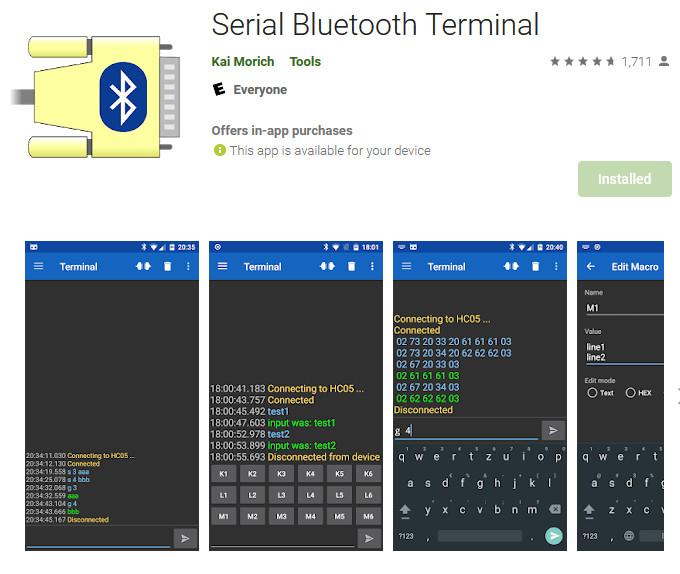
The Serial Bluetooth Terminal is an Anroid app used to communicate via SPP protocol to a Bluetooth device, tt can be found on Google Play. For our purposes, we only need the free version of the app.
Bluetooth SPP Connection #
Now that we have everything setup, we can go back to our workstation and open GTKterm. Input the following commands and we’ll be ready to establish the connection with the smartphone. If you’re using GTKterm, remember to hit also CTRL+J before hitting ENTER to add a CR LR to the end of the data sent:
AT+BTINIT=1
AT+BTNAME="esp-test"
AT+BTSCANMODE=2
AT+BTSPPINIT=2
AT+BTSPPSTART
Don’t worry if you don’t understand them all yet as we’ll discuss them in the next section. After each command is entered, an “OK” should be received if the command was accepted.
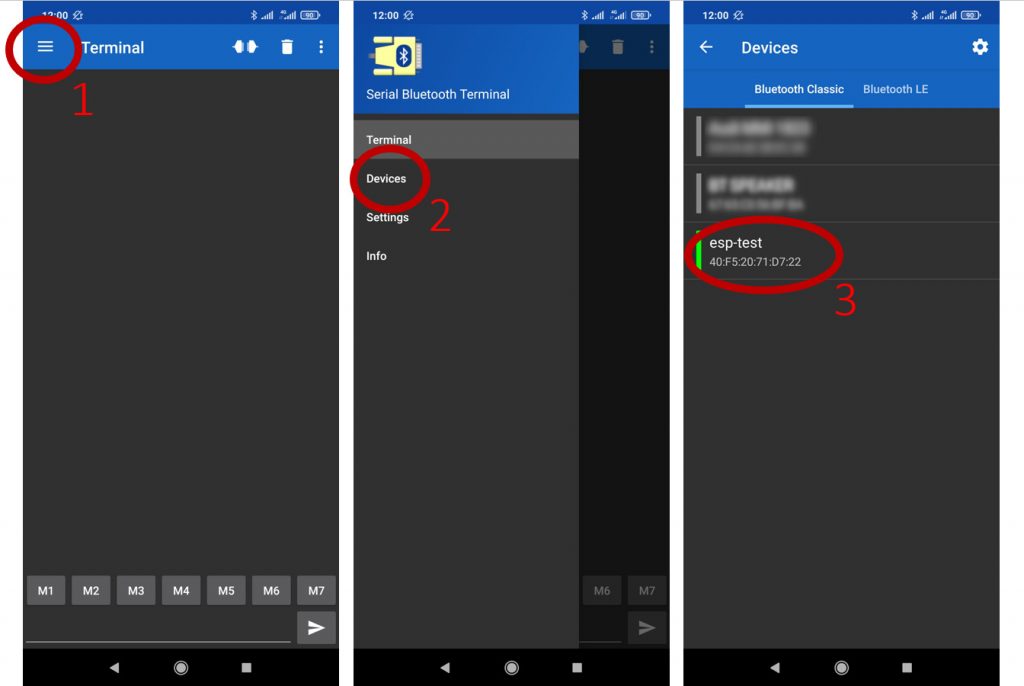
Now the ESP32 module will be both discoverable and connectable and should be seen in the app – if you are not seeing any devices, ensure that you have enabled Bluetooth on your smartphone. Click on the three lines in the top left hand corner (Step 1), select Devices (Step 2) and then the Espressif module (Step 3), which we named "esp-test" in the previous step:
After the connection is enstablished, +BTSPPCON:0, x should appear on our PC’s serial terminal where x indicates the MAC address of the devices which just connected to the ESP32 module:

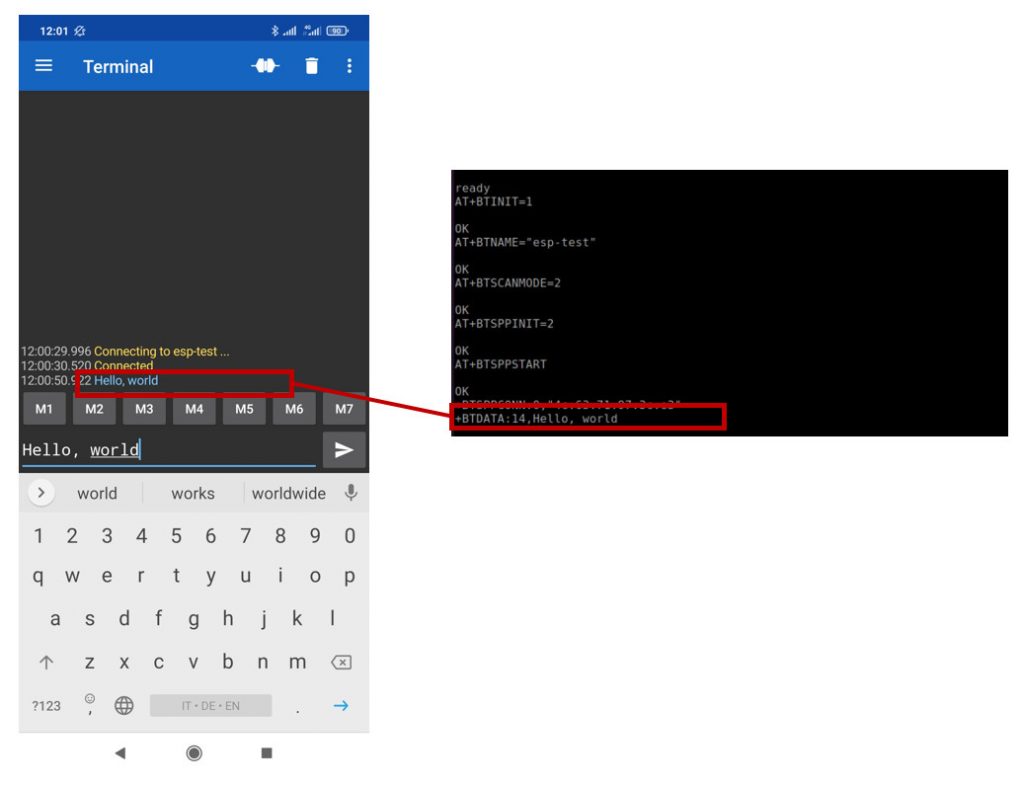
Now when we send something in the app, it will appear in our PC’s serial terminal after +BTDATA:y, where y is the number of bytes received. The data should then be fairly easy to pars by the host MCU or PC:
To send data from the ESP32 to the smartphone in passthrough mode, type the command AT+BTSPPSEND and after sending, the ">" character will apear. Whatever you type will now appear at the Serial Bluetooth Terminal screen. To exit passthrough mode and to go back to command mode, send a newline followed the string "+++" and the newline again:

AT commands step-by-step comments #
Every AT command is described in detail in the Espressif Documenation: AT command set
- AT+BTINIT=1: Bluetooth Classic initialisation.
- AT+BTNAME="esp-test": Sets device name.
- AT+BTSCANMODE=2: Set the scan mode to 2 making the device both discoverable and connectable.
- AT+BTSPPINIT=2: SPP profile initialisation.
- AT+BTSPPSTART: Starts the SPP profile and to allow devices to connect to it.
- AT+BTSPPSEND: Enters passthrough mode and everything we write is sent to the connected device. Without any additional parameter, the ">" character appears and you can send data to the connected device until a packet containing "+++" is sent, at which point we go back to command mode and anything sent from then on is interpreted as a command.
Conclusion #
In this tutorial we have enabled Bluetooth Classic on the ESP32 and enabled the SPP protocol in the ESP-AT firmware. We established a Bluetooth connection between an ESP32-Devkit-C (connected to a computer) and an Android smartphone using a short and easy list of AT commands.


