
Introduction #
In this tutorial we will be opening an example project in Keil for the NuMaker-M032KI board and programming it to the board. For this tutorial you’ll need:
- Nuvoton NuMaker-M032KI – Contact us for more info
- MicroUSB Cable
- Windows Computer with Keil Essential or higher or Keil Nuovoton Edition installed
- Nuvoton Nu-Link Keil Driver installed
- Nuvoton M031 device packs installed using the pack installer
- Nuvoton Nu-Link Keil driver installer should prompt you to install these
- Nuvoton M031 series BSP installed (also suitable for M032)
CMSIS #
For almost all their of their microcontrollers, Nuvoton provides a Board Support Package which comes bundled with some example code, libraries (including standard drivers), tools and documentation. All of this is based on Arm’s CMSIS (Cortex Microcontroller Software Interface Standard) software.
The CMSIS is a vendor-independent hardware abstraction layer for microcontrollers that is based on Arm® Cortex® processors. It defines generic tool interfaces and enables consistent device support, it provides a simple software interfaces to the processor and peripherals, simplifying software re-use, reducing the learning curve for microcontroller developers, and reducing the time to market for new devices.
The CMSIS is defined in close cooperation with various silicon and software vendors and provides a common approach to interface to peripherals, real-time operating systems, and middleware components. It is intended to enable the combination of software components from multiple middleware vendors.
You can read more on CMSIS on the ARM website.
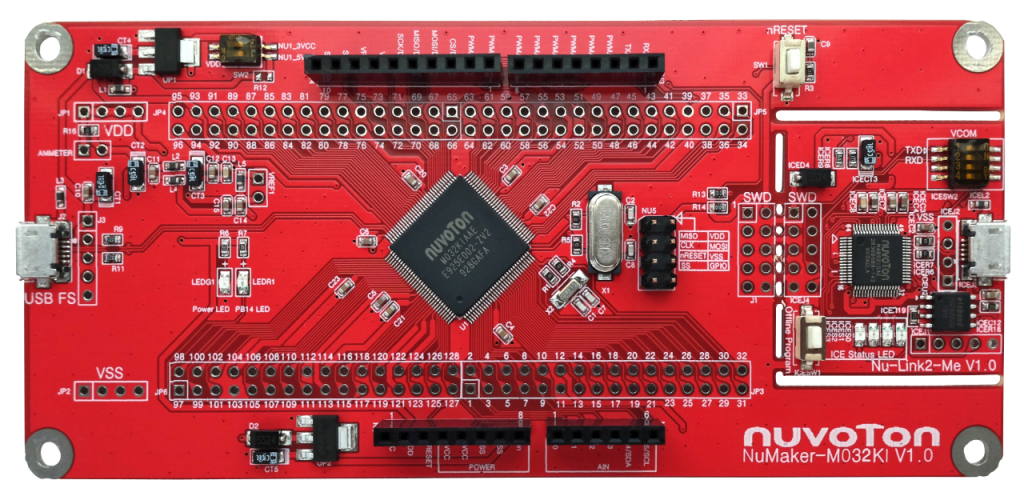
Get the “Template” example project running on the NuMaker-M032KI V1.0 #
The initial getting started project for the M03x Series is the “Template” project. This simple example gives out the message “Hello World” via the UART. You can check it with a Terminal Tool on your PC
Open the project #
- Open Keil µVision5 on your machine
- Got to “Project” -> “Open project…”
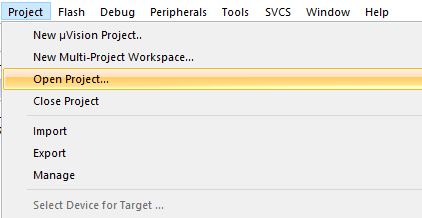
Then navigate to the folder where you stored the Board Support Package and open the Template uVision Project file: …\M031_Series_BSP_CMSIS_V3.03.000\SampleCode\Template\Keil
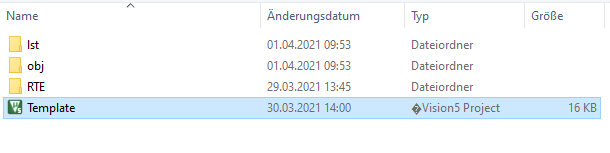
(you can also open the project by navigating to the “…\M031_Series_BSP_CMSIS_V3.03.000\SampleCode\Template\Keil” folder and double-clicking on the µVision5 Project file without opening µVision IDE before)
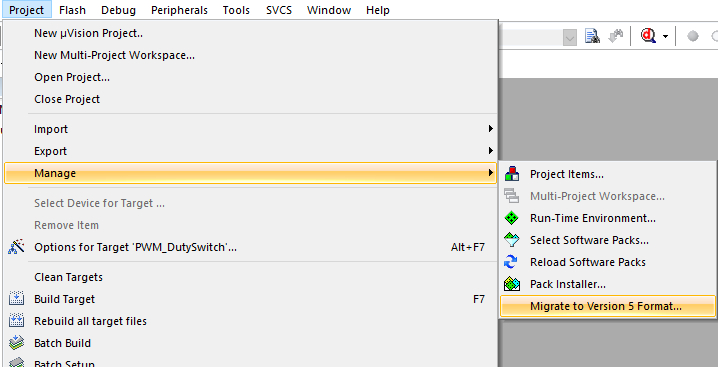
When you open this project it is very likely that you get an error message, saying that the preconfigured device is not found.
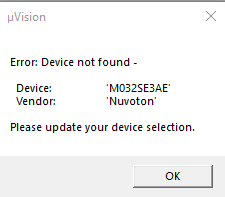
To get this problem solved you have to do two things:
- Migrate Project to Version 5 format…
- Select the correct device via the “Options for target…”
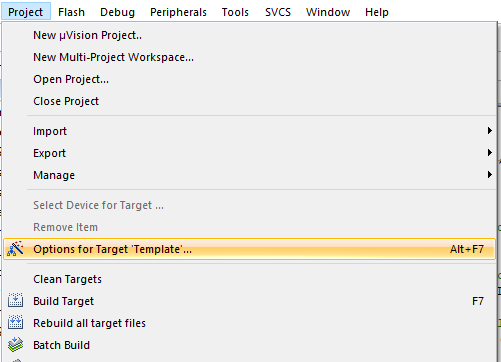
- Open the Options via “Project -> Options for Target..” or via the dedicated Icon on the Toolbar
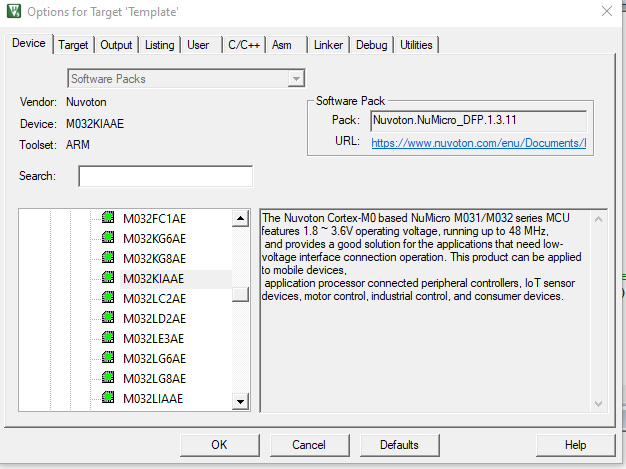
Under the tab “Device” you have to select the M032KIAAE in this case (which is found under “Nuvoton -> NuMicro M0 Family -> M031)
Further settings #
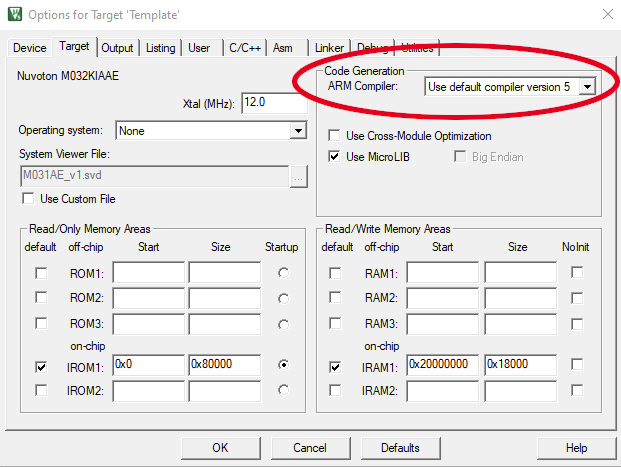
Further settings to be done in the “Options for target…” (usually this settings are already preconfigured for the Nuvoton examples, but they might change when migrating to Version 5; for newer Nuvoton BSP the compiler version 6 maybe also supported)
Set the Code Generation ARM Compiler to “Use default compiler version 5” (Tab “Target”)
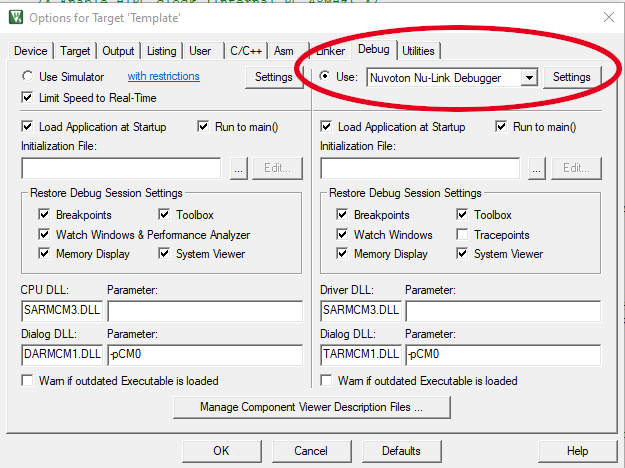
Under tab “Debug” select “Nuvoton Nu-Link Debugger” from the dropdown list to use it as debugger for the project
Connect the board #
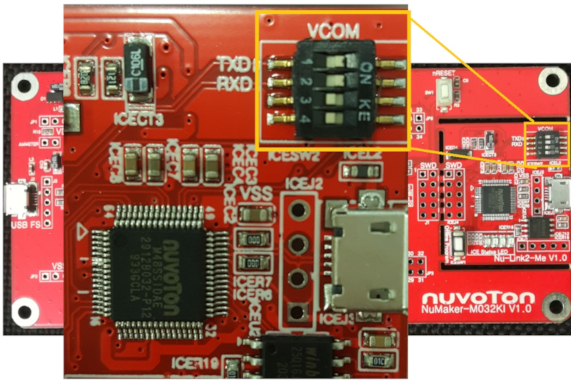
To later check the given out message via a terminal tool you have to switch on the virtual COM port on the board, by turning on Switch 1+2 on the VCOM Switch (Before connecting the NuMaker board to your PC via USB):
You can now connect the NuMaker-M032KI to your PC with a USB cable. Make sure you’re using the port on the Nu-Link2-Me Debugger on the board.
Build and run the code #
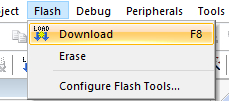
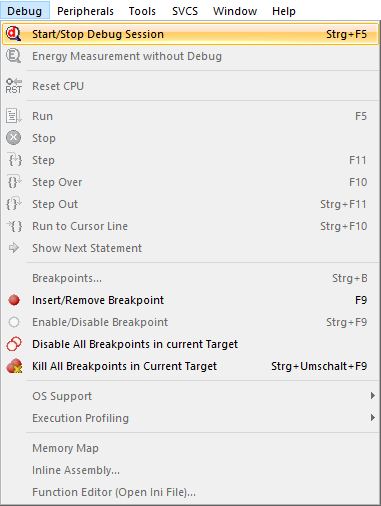
You’re now ready to build the code and debug it or download it directly to the target.
Build Options (or use the dedicated icons on the toolbar):

Download options (or use dedicated icon on the toolbar):
Debug Options (or use dedicated icons on the toolbar):
It might happen that Nu-Link driver version and debugger version on the board do not match. Then you have to update the firmware on the board. Just follow the instructions.
Check the COM port for “Hello World” message #
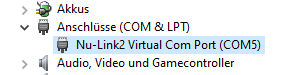
After flashing the MCU you can check the given out message on the VCOM port with a terminal tool you like. Just open your Device Manager to check for the corresponding COM Port (look for Nu-Link2 Virtual Com Port)
Then open your Terminal Tool (e.g. HTerm) and connect to the COM port of your board with a Baud rate of 115200 (8-bit data; parity: none; stop bits: 1 bit). You have to reset the MCU by pushing the nReset button on the board to get the message:

For more information on the Board and other IDEs check the dedicated webpage on Nuvoton’s website (you’ll find the User Manual under “Quick Start” tab -> point 6.).
Conclusion #
Now you’ve gone through part 1 of the tutorial, you’re ready to take Getting Started with NuMaker-M032KI part 2 or one of our more advanced tutorials.


